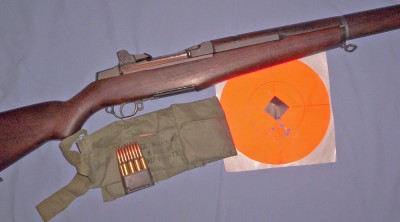
About two years a go I decided to get my first semi-automatic rifle; an M1 Garand from the Civilian Marksmanship Program (CMP). While I was waiting for my rifle, I began researching what I was going to feed it. I had ordered some M2 ball from the CMP but I wanted to use the rifle to begin shooting NRA High-power Matches and needed better accuracy over what I could expect from surplus ammo. I wanted to hand load my own ammunition to gain an edge without paying for match grade factory ammo.
As I started my research I found a lot of, for lack of a better word, “wives tales” about reloading for an M1 or any automatic rifle for that matter. I began to think there was some kind of black magic involved in reloading for a Garand and was wondering if I could ever hand load for it without blowing myself up with a slam-fire or ruining the operating rod from using the wrong powder. I heard things such as not to use your brass more than three times, don’t use slow burning powder, and not to use bullets weighing more than 165 grains. There was some truth to these things; but, not enough to merit the paranoia I found people had about reloading for a Garand.
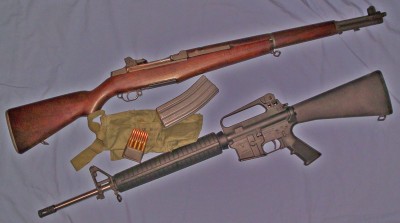
There is some of this fear about reloading for other semi-automatic rifles but not as much as with the Garand. Reloading for any semi-automatic rifle requires attention to the same details as reloading for the Garand so I have decided to talk about reloading for semi-automatic rifles in general with the Garand as the basis of the principles. I have not found any one source for this information so I will cover everything I have learned about reloading for an M1. I want to point out that this is not a comprehensive article on reloading. This is an article that points out important information for someone that has a good basic understanding of reloading and wants to start loading for a semi-automatic rifle. If you need more information on the basics of hand loading I suggest you purchase a good reloading manual and read it first; then read this article.
Avoiding slam-fires is the biggest concern when loading for semi-automatic rifles. A slam-fire happens when the closing of the rifle’s bolt causes it to fire without pulling the trigger; either when the first round is chambered or when a round is fired and the next round is chambered. Most semi-automatic rifles have a free floating, or inertia firing pin. When the bolt slams forward it causes the firing pin to hit the back of the primer slightly. If there is any binding as the round is chambered the firing pin can hit the primer to hard and cause the round to fire. If the round is too tight to fit into the chamber properly a slam-fire can happen before the bolt is all the way closed and cause serious damage. The most important factor to avoid a slam-fire is to make sure that the external dimensions of the loaded round are within the dimensions of the rifle’s chamber.
Sizing:
The first step in the hand loading process is sizing the fired case. For this step it is important to have a good full length sizing die for the caliber being sized. The most important part of this step is to make sure the die is adjusted properly to bring the case back into the proper dimensions to fit in the rifle. There are two dimensions that need to be accounted for; they are headspace and base size.
Chamber headspace is the distance from the face of the bolt to the shoulder of the chamber. Cartridge headspace is the distance from the bottom of the case to the shoulder of the case. When you are sizing your cases the goal is to get the cartridge headspace set back to where it is .003” to .004” shorter than the chamber headspace of the rifle. Or if you are loading for two or more automatic rifles in the same caliber the case needs to be sized to where the cartridge headspace is within standard specifications.
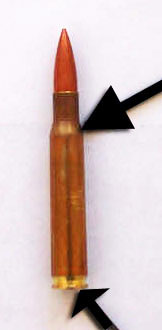
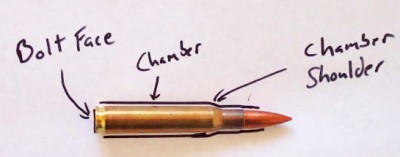
To set the sizing die to size the case to the proper headspace you need to have a way to measure headspace. I prefer the Hornady Lock N’ Load headspace gauges. Using this system you can measure several fired cases from an individual rifle and then adjust the sizing die until they are sized .003” to .004” shorter than they were when they came out of the rifle.
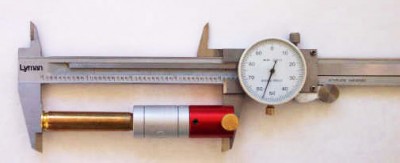
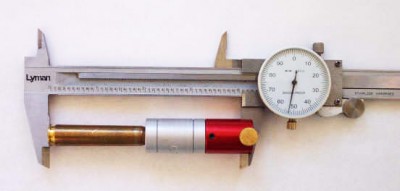
If you are loading for several different rifles a headspace gauge that measures whether or not the cases are being sized to within standard minimum and maximum dimensions is very useful. This type of gauge is a simulated chamber that you insert a sized case into. If the case fits into it without going in too far, or not far enough then the case is properly sized. This type of case gauge is sold by Dillon Precision.
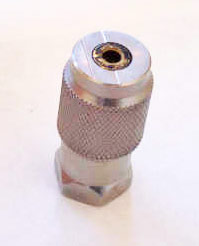
To begin adjusting the die a good starting point is to screw the die in until it touches the shell holder when the press ram is in the highest position. You then size a properly lubed case and measure the headspace; if the headspace is to long screw the die in an 1/8th turn and size another case. If the headspace is to short screw the die out. Keep doing this until a case is sized .003” to .004” shorter than the un-sized cases fired in the rifle you are loading for; or, until they fit in the chamber style headspace gauge properly. It is important not to size the case to much or the case will go into the chamber of the rifle too far and the firing pin may not be able to hit the primer.
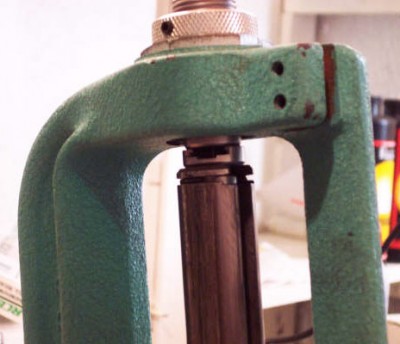
Properly lubing the cases is very important. If the cartridge cases do not move in and out of the sizing die easily it will be hard to get very consistent results. I prefer to use a spray lube such as Hornady One Shot. I apply a good even coat over the whole case. It is important that you lube the cases you use to adjust the sizing die in the same manner as you will use when sizing after the die is set up. Cases that are sized with different amounts of lube on them will have varying headspace.
The other measurement that is important to when sizing is the base of the case. To make sure this measurement is right you take measurements of several cases fired out of your rifle about 1/8th of an inch above the extractor groove. After you size the cases measure this same area to make sure that they are being sized at least .002” smaller. If you use a chamber style headspace gauge make sure that the case fits into the gauge and is not too tight in the base area. If the case needs to be sized more in the base area you may need to use a small base sizing die; I highly doubt this will be necessary unless your rifle has been fitted with a barrel that has a tight match chamber.
Trimming:
All cases need to be measured to make sure they are shorter than the maximum case length allowed. If they are to long they need to be trimmed to the trim-to-length found in most reloading manuals. I prefer the Lee hand trimmer. I chuck the shell holder end of the trimmer into a drill and use the drill to turn the case.
Priming:
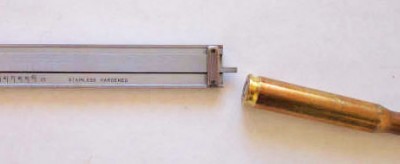
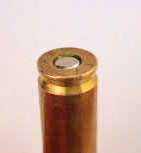
This step is pretty simple you insert the primer in the case with a priming tool. The tool you use doesn’t really matter as long as it is a safe and consistent system. The important thing is that the primer is seated to .003” to .005” below the bottom of the case. There is a lot of controversy as to whether or not you need to use mil-spec primers such as the ones made by CCI. I feel they are unnecessary for semi-automatics and that making sure headspace is correct and that the primer is properly seated is more important. If you are loading for a fully-automatic rifle I would recommend using them. The brand and type of primer is really up to you as long as it is safe for your load data. I prefer Federal standard rifle primers for my 30-06 loads.
If the primer needs to be seated deeper, and it was seated until it bottomed out in the case, the primer pocket needs to be made deeper by using a primer pocket uniformer. This tool makes all the primer pockets in a batch of cases the same depth by reaming out the bottom of the pockets. This in not necessary very often but match shooters often do it to ensure uniformity. Also it should be brought up that if you are using military cases the primer crimp needs to be removed.
Powder:
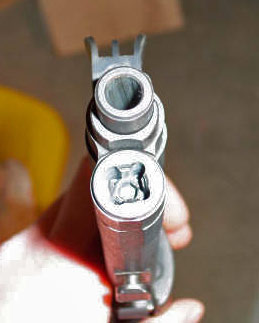
This is another area of concern for people that are getting into reloading for an M1 Garand. If a powder is used that has a burn rate that is to slow it can cause too much pressure at the gas port and bend the operating rod. The M1 Garand’s gas system was set up for 4895. If a slow powder such as 4350 or 4831 is used it can ruin it.
To make sure you use the proper powder; always use 4895 or a powder that is very similar in burn rate. Another option that I prefer is to use an adjustable gas plug to relive the amount of pressure going into the gas system. I use the one made by Schuster and sold by Midway. This has allowed me to use up to 60 grains of H4831 behind a 178 grain Hornady A-Max bullet with no problems. In fact I was able to adjust the gas plug until the action had just enough gas pressure to cycle and no more. Other automatics such as the M1A, AR-15, and M1 Garands chambered in 308 Winchester are not as touchy about which powder you use. Almost any powder that is commonly used for the caliber they are chambered is fine.
Bullet Seating:
When seating the bullet I would not worry about trying to get close to the rifling of the barrel. The best way to seat the bullet is to just seat it to the same length as M2 Ball ammunition if loading for a Garand; or whatever the standard ammunition is for the semi-automatic you are loading for. If you don’t have a loaded round you can look up the standard specifications for bullet seating depth and make sure you are within them.
To adjust your die use a properly sized case that doesn’t have a primer or powder in it. Seat a bullet in this case until it is the length you want it. Then check to make sure the round fits in the magazine and chambers without touching the rifling of the barrel. If the bullet is seated to long seat it deeper; but, make sure it is just deep enough to clear the magazine or is at least .01” from touching the rifling.
These are the main things to pay attention to when loading for a semi-automatic rifle. The purpose of the steps outlined above is to ensure that the cartridge feeds through the rifle and is chambered without any binding or excessive tightness. With the right knowledge and attention to detail any shooter can hand load for their semi-automatic rifle without any problems.

i read your article on reloading for your garand. very good except for your opinion on which primers to use.
i went along for years reloading for my garands. never had a problem untill i had a slam fire. it was impressive, broke a lug off the bolt, startled the crap out of me.
it wasnt a high primer, it was a remington large rifle primer.
i took a series of primers to a lab, the remington primers were the softest, and winchester and cci were the hardest, and close to what winchestewrs military primers are, regarding hardness.
now i try to obtain milsurp primers, if not then cci and then win.
and i dont reloaded milsurp cases more than twice, had constant problems with neck spitts.
thought you might want to know.